
Constructing Your Image
How do you plan a photo session? Where do you start? You watch a pro set up a session and it just seems to magically come together. After years of creating images, pros often don’t even notice their planning flow.
Today I thought it might be helpful to walk through that flow in their best order. Taking this approach will bring your image vision together quicker with better results.
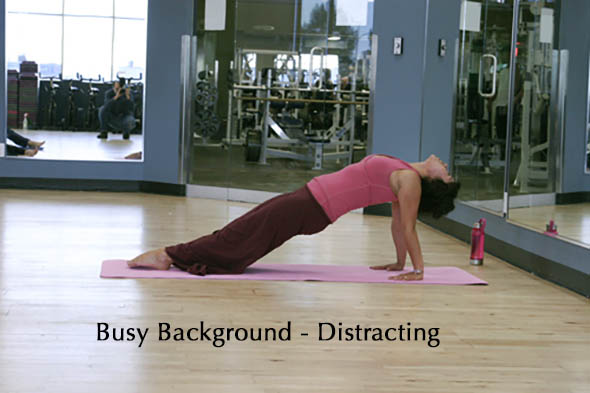
Always start with planning your background first. What do you need it to be? Clean, cluttered, indoors or outdoors, dark or light, real or a backdrop. A deep, far away background or close and contained.
Picking one over another begins the vision. Once chosen lots of options vanish, other considerations become clear. It gives your image mood and character; it is the frame your image will exist within.
This works if you are planning an image in the studio or going for some street photography. You could consider the background as your setting. Include at this stage the foreground elements needed and props to use.
The next element to consider is lighting. Think of your scene as a black hole; it’s nothing until you decide how to light it up. The first consideration is the direction of light. Should it be high, low, from behind or diffused. Then decide on the quality of light; soft or hard, something in-between? Finally what is the colour of the light. You can see the difference the colour of light makes by looking at movies and TV shows.

The colour of light is a whole language that we have learned from the visuals in videos and stills. Night time light is bluish, sunsets are warm and romantic. Dark greens are usually alien and evil. Light, bright greens are positive and naive, fresh and healthy. Light blues give the image a chill and so on.
Now it is time to consider your subject. What are they doing there? Whatever they do, it’s a pose. A pose is just a body position. It can be guided or left to the subject’s whims, which could be bad. After all, they might not have the insights into why you chose that background and that light. At the very least, you will need to guide them into the attitude needed for the setting and image purpose. This translates into the stance and limb position they need for your image.
Poses can be strong and powerful or soft and delicate, a sculpture or something awkward. Of course, it has to match or contrast with the setting and lighting . For example, a refined setting with elegant lighting might not match or speak clearly with an awkward pose. Do they sit or stand or lounge about? Do they interact with the background or environment or are they aloof? Do they stare directly into the camera, aware of it’s presence or are they mysterious, looking away.
It’s a bit like a puzzle. Each element has to fit, be cohesive making sense and building on the other elements.
Finally, we arrive at lens choice. Is it a long lens that squashes the background towards the viewer? Is it a wide angle that puts the viewer on the edge of a vista to your scene? What depth of field will you need with the other choices you have made? Do you need a fast lens to deal with low light or create a shallow depth of field?
You can see that by making choices in this order; background, lighting, pose then finally lenses it makes it easy to construct your image. Each step limits the next array of choices, even directs you naturally into the selection.
Keep in mind the choices do not need to be complimentary. For example having a very delicate set with soft ethereal lighting then putting an outlandishly dressed subject in a dangerous powerful pose then finish by using a wide angle lens in close that totally distorts everything becomes a statement,
It just has to be determined choices, with purpose to make contrasts or counterpoint elements work.
You can see how starting with a lens and going backwards or mixing the flow up will make your process harder to work for you. After a while, taking this approach will become second nature..
At that moment, you will have realized you have become a pro.
This Sunday I will be applying this approach to my photography program at Calgary Expo, the comic con for Calgary. At the end of my talk I am doing a draw for 30 minutes of one-on-one teaching. Come join us!
Here are the details – Costume Photography – Tricks & techniques
Room: Palomino H
Time: 4:00PM – 5:15PM –
See more at: http://www.calgaryexpo.com/programming/#sthash.Mgo6vQbN.dpuf

Recent Comments